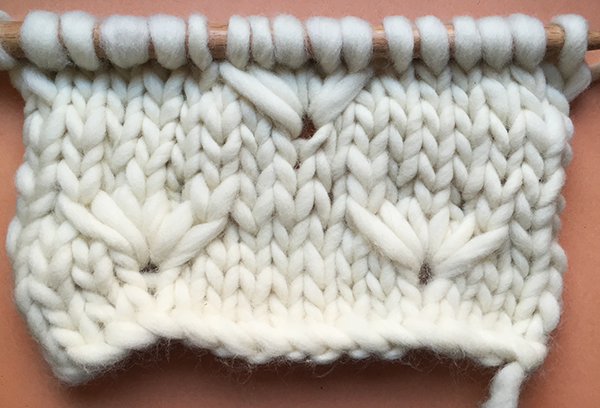
There a lot of different types of cable, some are simple and other more complicated. But the one we want to teach you today is really easy to knit, but offers spectacular results for your knitted garments.
You can use this cable into most of our knitting kits to add a special touch and personalize your project. Plus, you don’t need a cable needle like you do for other cables; you can make it with just 2 needles!
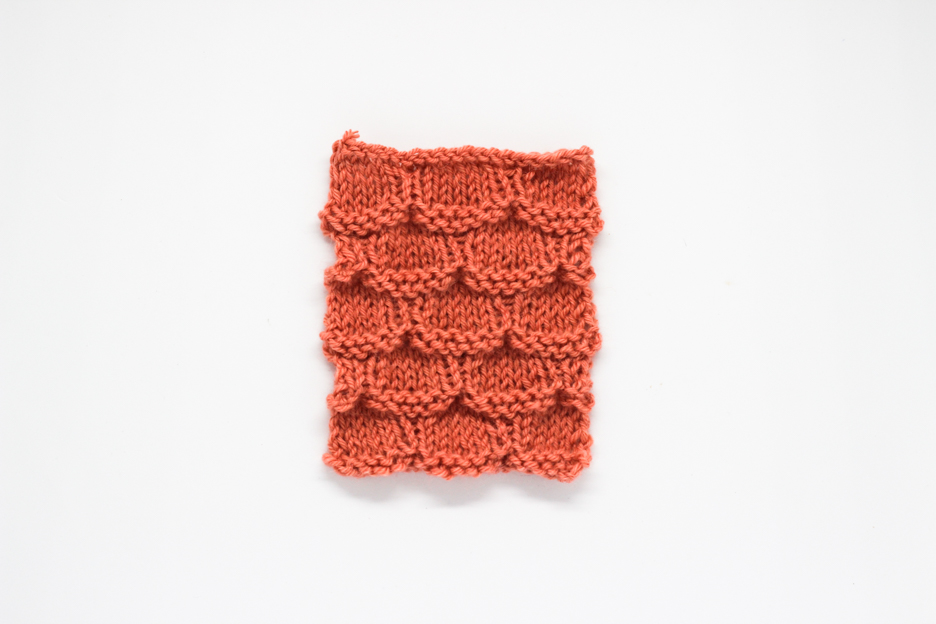
Watch our video to learn how to knit Caliper Cables:
You can incorporate this stitch anywhere in your garment that you have at least 10 stitches. We recommend leaving several stitches between pattern repeats, and at the beginning and end of the row, so that the cable stands out more.
This cable is started on the wrong side of your work. We knit our sample over a background of stockinette stitch, but you can use it with a different background stitch if you prefer.
Row 1 (wrong side): purl until you reach the spot where you want to place the cable, purl the next stitch wrapping the yarn around the needle twice, purl 8, purl the next stitch wrapping the yarn around the needle twice, purl to the end of the row.
Row 2 (right side): knit until you reach the stitch with the yarn wrapped twice. Very carefully drop it off your left-hand needle and leave it in front of your work. Knit 4, insert your left-hand needles into the dropped stitch and knit it as usual. Slip the next 4 stitches purlwise. Drop the next stitch with the yarn wrapped twice and leave it in front of your work. Return the 4 slipped stitches to your left-hand needle. Now insert your right-hand needle into the dropped stitch and place it on your left-hand needle, in front of the 4 slipped stitches. Knit the dropped stitch. Knit the rest of the stitches.
Repeat these two rows until you reach the desired length, or until you don’t want to incorporate any more Caliper Cables.
By dropping the double-wrapped stitch and changing the order in which we knit the stitches we create a longer stitch than usual and this creates the cable effect. As you can see, it’s fit for beginners 😉
What about you? Where would you use this stitch? For a sweater? Show us your projects knitted with WAK yarn using the hashtag #weareknitters on social networks, we love to see what you are making!