We can decorate our scarves, shawls or blankets by finishing off the work with some beautiful macramé fringe, giving texture to even the simplest pieces.
These flowers are created with the two most basic macramé knots. You’ll see that it’s simpler than it seems.
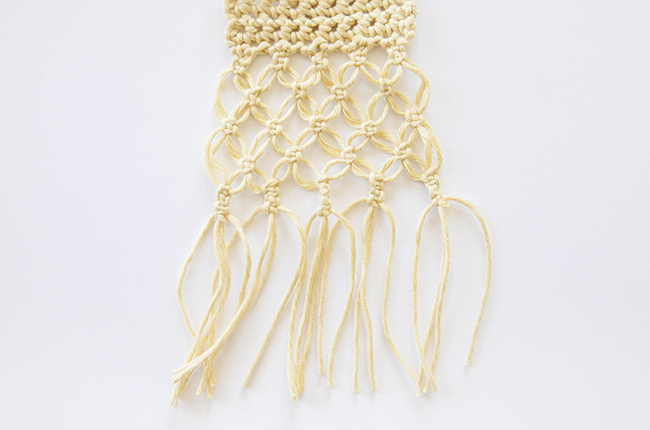
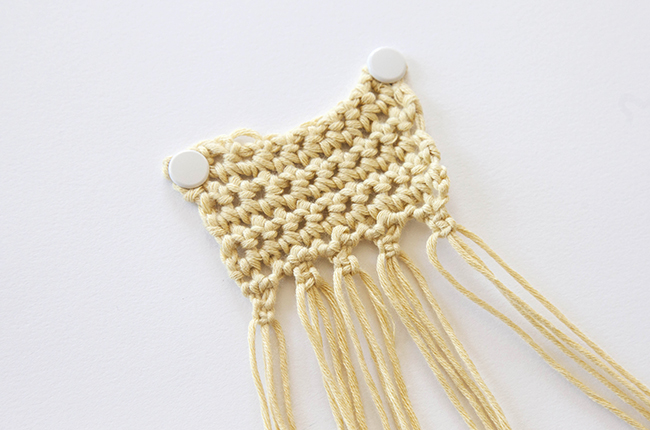
Before you begin, make sure your work ends with an even number of stitches. For our sample, we crocheted a few rows with 10 single crochet stitches each.
Cut a few strands of thread, each about 24 inches long. Cut a number of strands equal to the number stitches that you have (in this case, 10 strands).
One by one, fold the strands in half, and with the help of a crochet hook insert them in the stiches, as indicated in the photo.
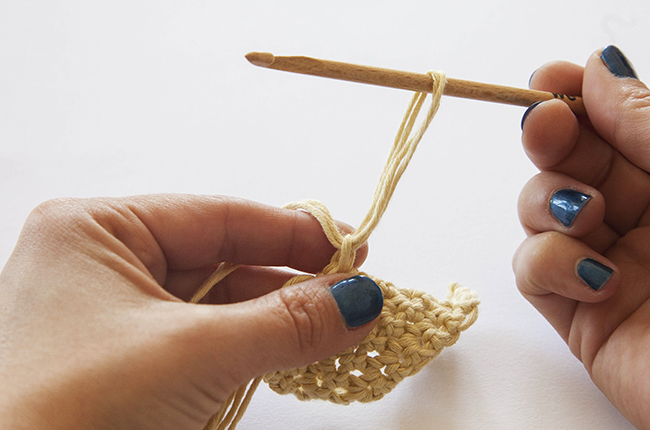
To secure them, insert the ends of the threads through the loop and pull to adjust the knot.
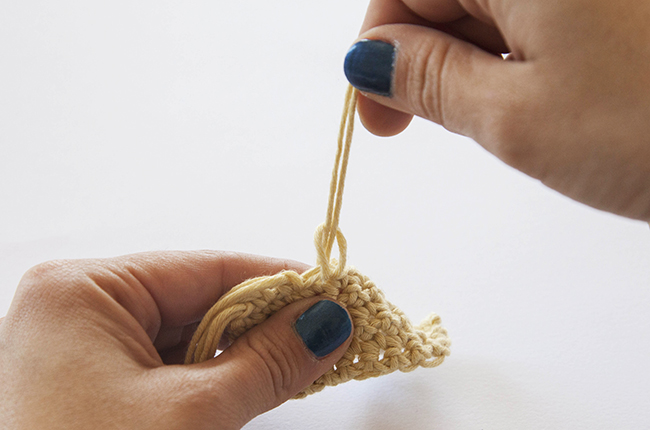
Follow these steps for each stitch of your work to prepare the threads that we’ll use to do the macramé.
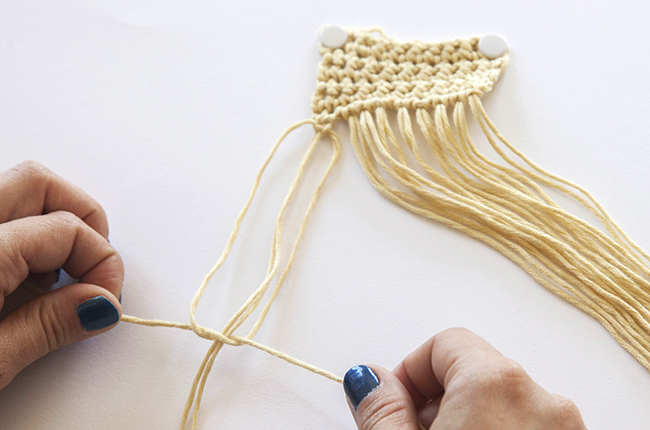
Secure the work with pins onto a cardboard surface to make it easier for you to work. Separate the first four threads. We will always work in groups of four threads.
Row 1: To make the first knot to the right, take the first strand and form a 4 by placing the strand on top of the others. Then take the fourth strand and pass it over the first, as shown in the photo.
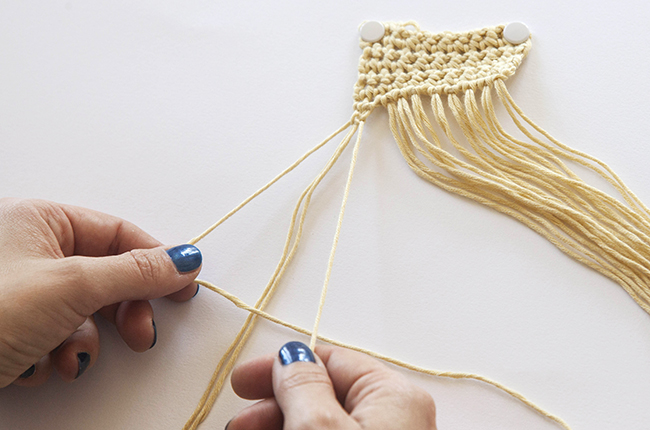
Pass the fourth thread underneath the two threads that remain in the center.
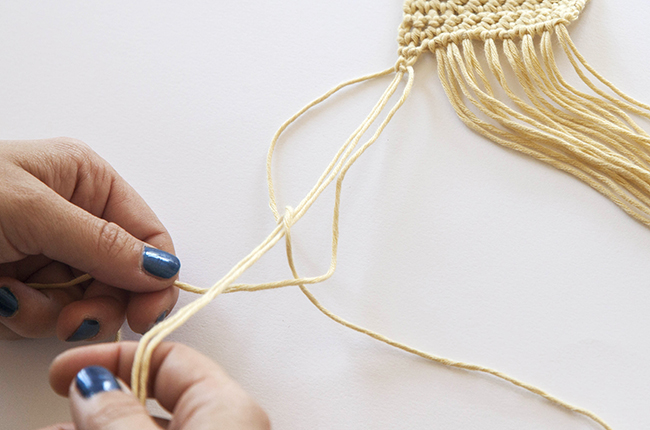
Then pass the fourth thread through the fourth hole.
Finally, pull gently to form the knot.

Adjust it.

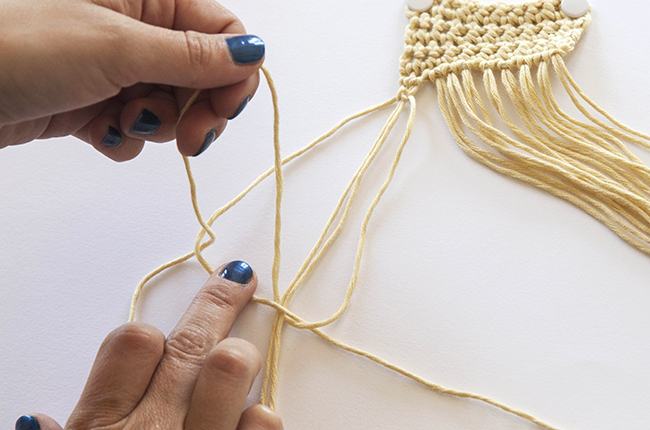
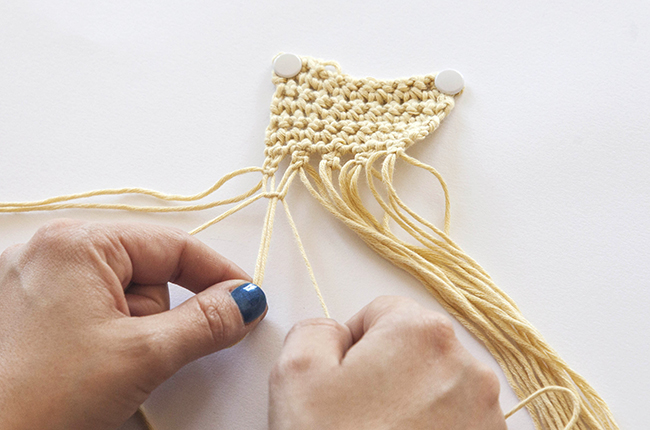
To make the second knot, we will do the same but to the left.
Take the fourth thread and form a D, placing the thread on top of the others. Then take the first thread and pass it over the fourth. Pass the first strand below the two that remain in the center.

Then pass the first strand through the D.
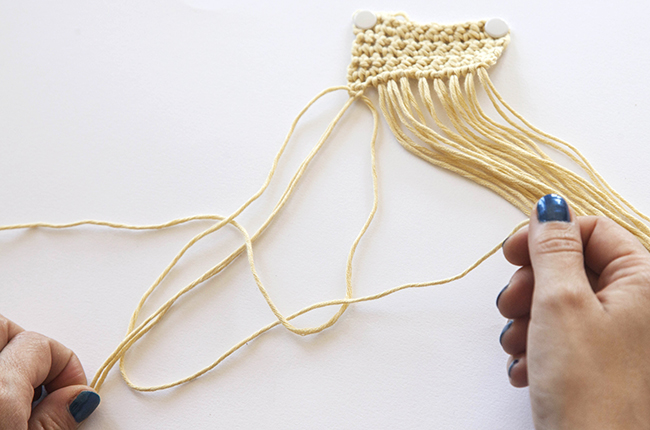
Finally, pull gently to form the knot and adjust it.
To finish with the first group of 4 threads, make the first knot again to the right.
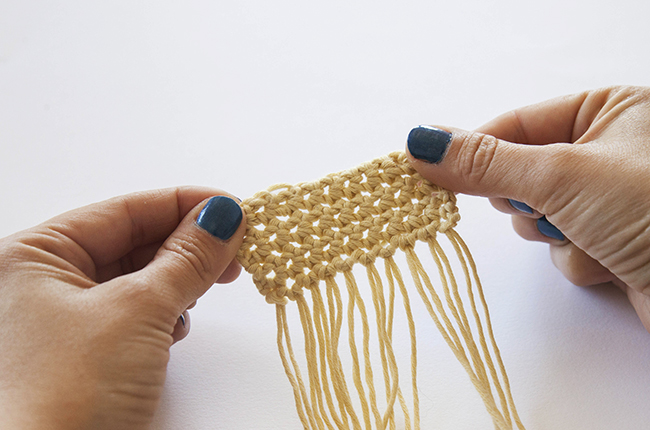
In this way, we will form the entire line. Working in groups of 4 threads, making three knots at a time, to the right, to the left and to the right again.
Row 2: To make the second line, set aside the first two threads and work with the next four.
When making the first knot, leave a space of about half an inch from the first line of knots. Thus, we form the upper petals of our flowers.
Then make a knot to the left and once again to the right. Work the whole line in the same way, in groups of four threads. Set aside the last two.

Row 3: In the third line, we form the lower petals of the flower. Go back to work with the first four threads. Make the first knot to the right, leaving a space of about half an inch from the second line of knots.

Work as you did for the other lines, making three knots each time– to the right, to the left, and to the right again.
You can create as many lines of flowers as you want.
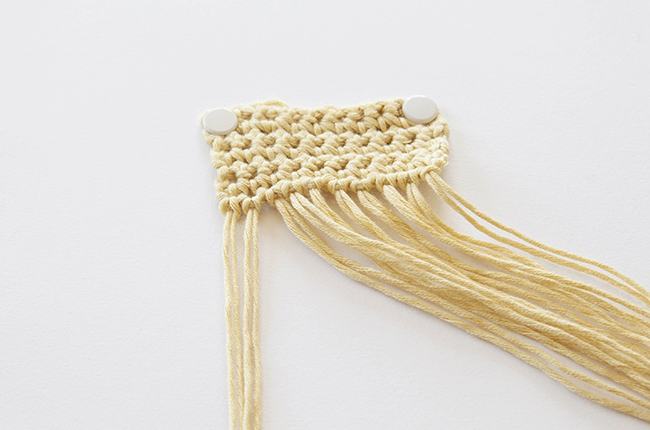
Final Row: When you have the desired number of flowers, make several alternating knots (right, left, right, left, right, left) to finish the fringes.
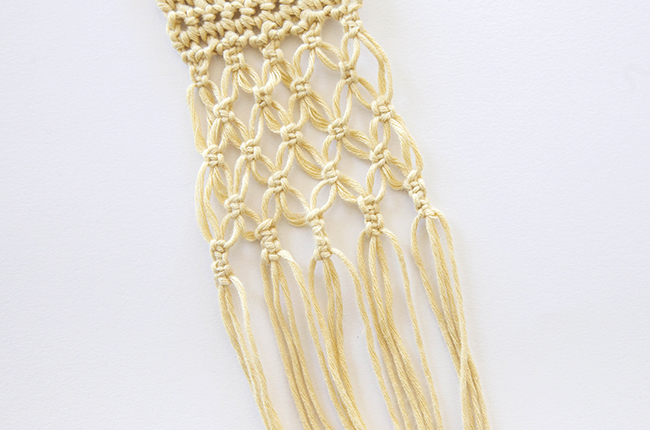
Finally, leave about 3 inches of yarn and cut the leftovers.
For this work we have used 100% Pima Cotton. We also recommend that you try macramé with The Tape because the results with thick materials are spectacular.
As always, we encourage you to share your creations with us on Instagram, using the hashtag #weareknitters. We would love to see everything you can do with this basic macramé technique.